ブログを書く
残りのガイドCloudCannonを使って進めていきます。 もしできるなら、GitHubに変更をpushしてもよいですし(CloudCannonにも反映されます)、直接CloudCannonで編集をしてもよいです。
いよいよウェブサイトにブログを追加しましょう。
ブログ記事は、_postsフォルダ内のマークダウン ファイルです。
_postsフォルダをウェブサイトルートに作成しましょう。
CloudCannonでフォルダを作るには、まずファイルを作成してからファイルメニューの”Move to a new folder”を選択します。
CloudCannonでは空のフォルダを作る方法がありません。
Jekyllはブログ記事に、特定の形式名前をつけるよう期待しています。フォーマットはYEAR-MONTH-DAY-title.mdです。
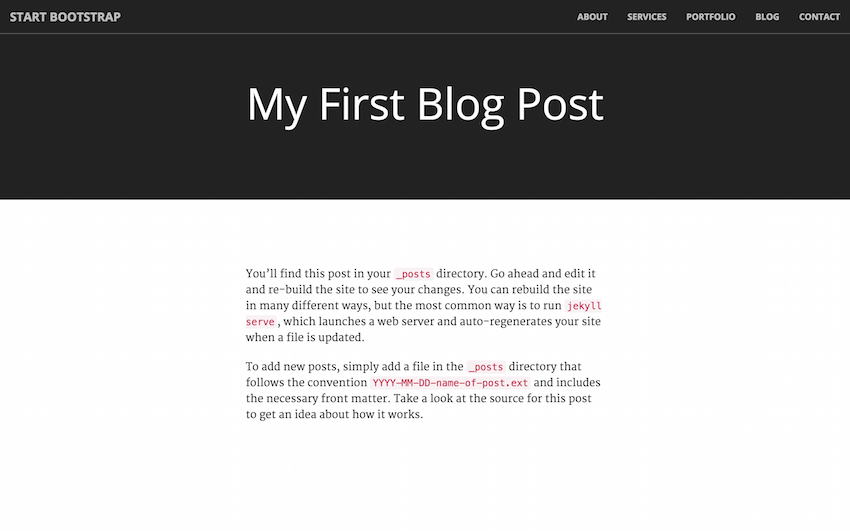
_posts/2015-03-06-my-first-post.mdというファイルを以下の内容で作成してください:
---
layout: post
title: My First Blog Post
---
You'll find this post in your `_posts` directory. Go ahead and edit it and re-build
the site to see your changes. You can rebuild the site in many different ways, but
the most common way is to run `jekyll serve`, which launches a web server and
auto-regenerates your site when a file is updated.

To add new posts, simply add a file in the `_posts` directory that follows the
convention `YYYY-MM-DD-name-of-post.ext` and includes the necessary front matter.
Take a look at the source for this post to get an idea about how it works.ご覧のとおりpostというレイアウトを使っているので、作る必要があります。_layouts/post.htmlを作りましょう。
ゼロから新しいレイアウトは作りたくないので、レイアウトの継承を使いましょう。
Front Matter内で、親レイアウトとして他のレイアウトを指定することができます。
/_layouts/post.htmlに以下を記述しましょう:
---
layout: default
---
<section class="bg-dark">
  <div class="text-center">
    <h1>{{ page.title }}</h1>
  </div>
</section>

<section id="contact">
  <div class="container">
    <div class="col-md-6 col-md-offset-3">
      {{ content }}
    </div>
  </div>
</section>
次に全てのブログ記事の一覧が表示されるページを作りましょう。
以下の内容でblog.htmlをウェブサイトルートに作成します:
---
layout: default
title: Blog
---
<section class="bg-dark">
  <div class="text-center">
    <h1>Blog</h1>
  </div>
</section>

<section>
  <div class="container">
    <div class="row">
      <div class="text-center">
        <ul style="list-style-position: inside">
           {% for post in site.posts %}
             <li>
               <a href="{{ post.url }}">{{ post.title }}</a>
               - {{ post.date | date: "%d %B %Y" }}
             </li>
           {% endfor %}
        </ul>
      </div>
    </div>
  </div>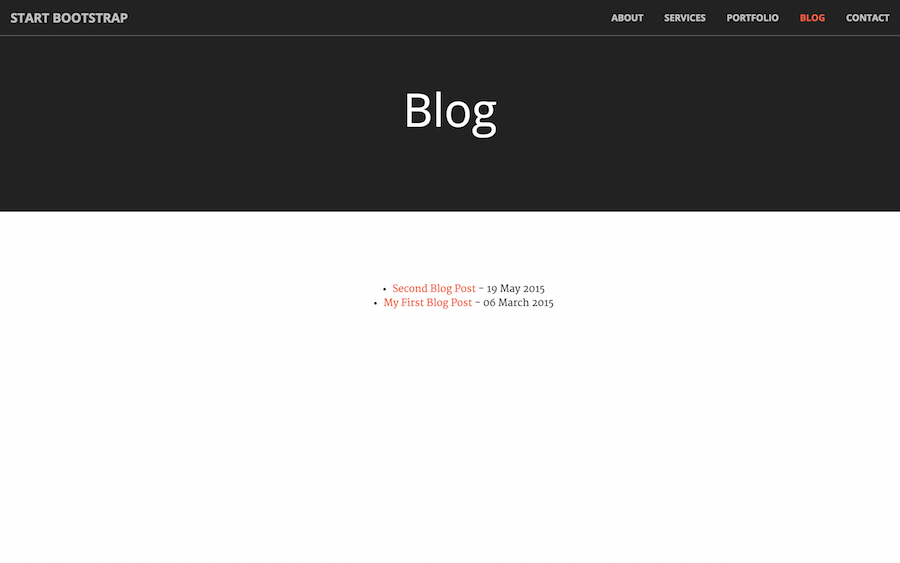
</section>site.postsは全てのブログ記事を持ったJekyllの変数です。ブログ記事に対し繰り返し処理をし、URL、タイトル、日付を出力します。
最後のステップはnav.htmlにブログリンクを追加することです:
...
<li {% if page.url == "/blog.html" %} class="active" {% endif %}>
  <a href="/blog.html">Blog</a>
</li>
...
ブラウザを開、最初のJekyllブログ記事を確認しましょう。
次に、クライアントがどのようにブログを更新できるか見てみましょう。
CloudCannonタブのCollectionsに移動します。 Draft Posts(下書き記事)とPublished Posts(公開済み記事)というタブが表示されます。
_draftsフォルダにあるDraft postsは、ウェブサイトとして公開されません。
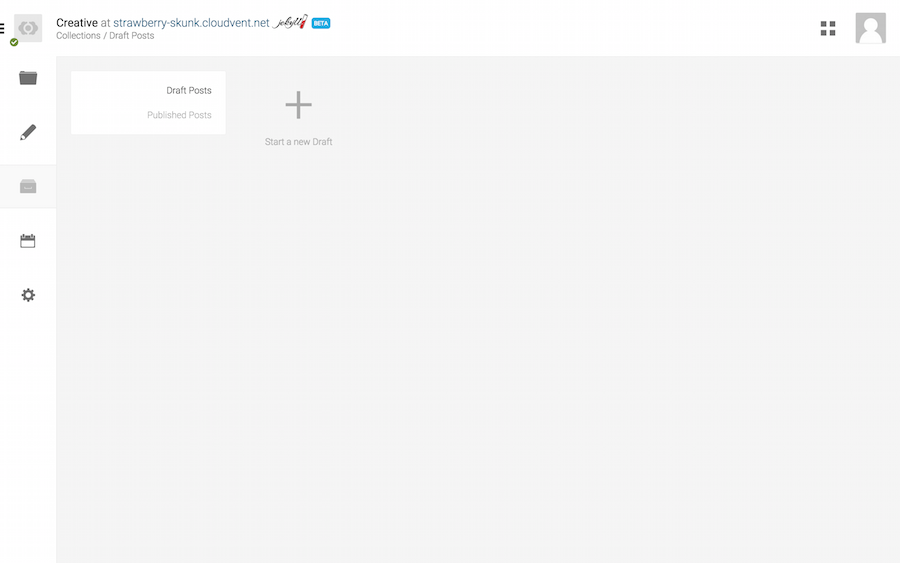
Published Postsに移動すると、最初のブログ記事があるのがわかります。 記事をクリックするとビジュアルエディタで更新ができるのがわかるでしょう。
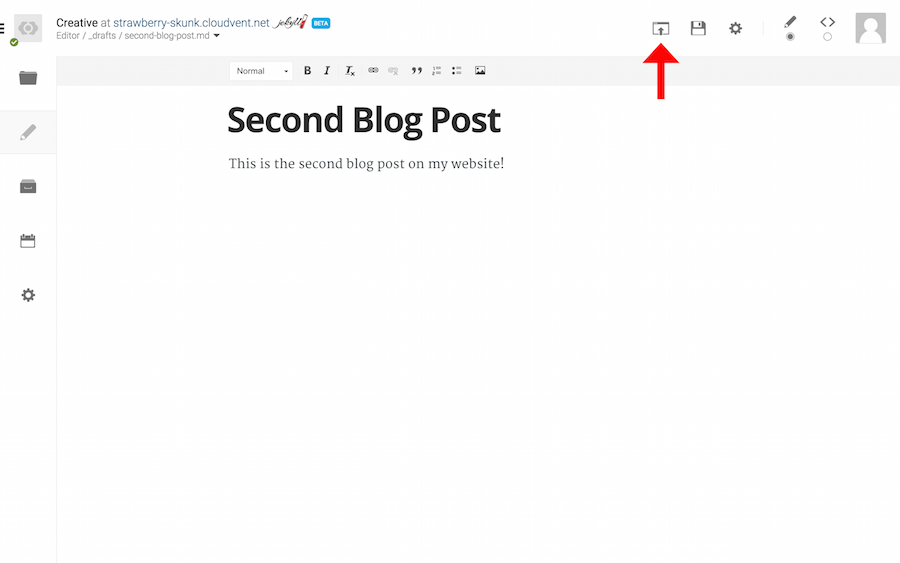
Collectionsに戻り、Start a new Draftをクリックして、新しい記事を追加し、内容を書いていきます。
記事が完成し、Publish Postを押すと_draftsフォルダから_postsフォルダに現在の日付をつけたファイル名で移動してくれます。
あなたのcloudventドメインにアクセスし、blog.htmlにアクセスしてください。2つのブログ記事がありますね!